|
DeWitchez
3-Layer Textured Pool-shadowed
Background
&
Frame
Tutorial* 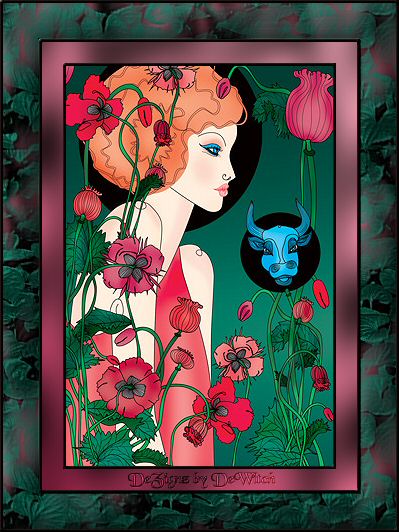 This was originally created
(by me) as a PSP
script (7/22/06)
but so many people do not use them that I
decided to write
a tut for it since I
think the background is a very pretty one.
I really do prefer creating the PSP scripts:)
(hope I have not left out any steps)
Needed
PSP
Image of your choice
Music may be turned off at the bottom of
this page
~ ~ ~
BACKGROUND
Open a new image - 400 x 400
transparent
Fill with a bright or light color from your
image
~
Add a raster layer - fill with a darker color from your image
Use Filter Factory A "poolshadow" on this
layer
Settings at default and 75 for intensity
& brightness
(or to your liking)
~
Add another raster layer
Select a medium color from your image and a
"texture"
(I used "green leaves"
texture)
Adjust the opacity of this layer to your
liking
~
Merge all layers and apply PSP - Image
Effects "seamless
tiling"
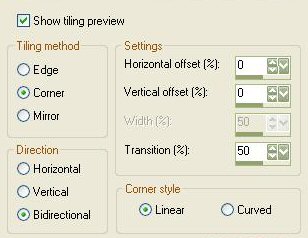 ~
"Emboss" for best effect
(I used Filters Unlimited
Convolution - emboss light)
FM Tiles
"blend emboss" is fine
(default
settings or your choice)
~ ~ ~
FRAME
Duplicate and resize your image if
needed
~
Add a 3 pixel border - select - fill
with a
color or gradient of your
choice
(make sure the "texture" is turned off)
Keep selected and apply PSP "inner
bevel"
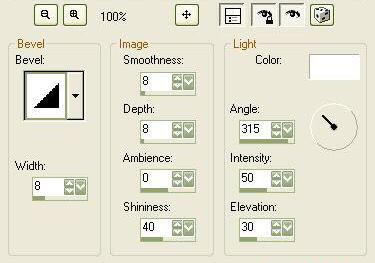 deselect
~
Add a 21 pixel border - select - fill with
color or gradient of your choice.
(I used a soft gradient with a 45ş angle and no
repeats)
Apply Filter Factory A "poolshadow" to
your liking
deselect
~
Repeat the 3 pixel border &
bevel
deselect
~
Add a 36 pixel border - select the border -
choose "pattern" and
the background you just created - fill
this border
Apply this PSP "inner bevel"
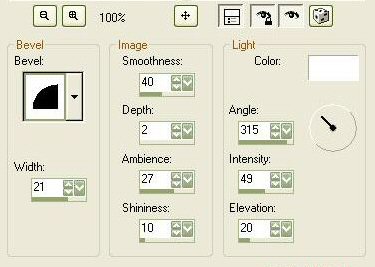 While still selected you may apply
"emboss" again or not (your choice)
deselect
~
Repeat the 3 pixel border & 1st
bevel
~
Merge and add your watermark, corners, etc.
as desired:)
~ ~ ~
Hope you enjoy this tutorial
If you have any problems please email
me
*©Tutorial written &
dezigned by DeWitch 3/14/07
This tutorial may not be downloaded for any purpose
other
than to follow the tutorial. If you're a Moderator of a group, please e-mail me before adding this tutorial to any lessons, etc. When you do have my permission..... only a text link is allowed. My tutorials are not to be sent in any mailing list ~ ~ ~
|